This is an updated and improved version of the OneLogin connector! If you’re setting up OneLogin with C1 for the first time, you’re in the right place.
Capabilities
*You can opt into syncing privilege data; this is not synced by default.
Gather OneLogin credentials
Configuring the connector requires you to pass in credentials generated in OneLogin. Gather these credentials before you move on.
A user with Administrator or account owner access to your OneLogin account must perform this task.
Create an API credential
Sign into OneLogin as an Account owner or Administrator.
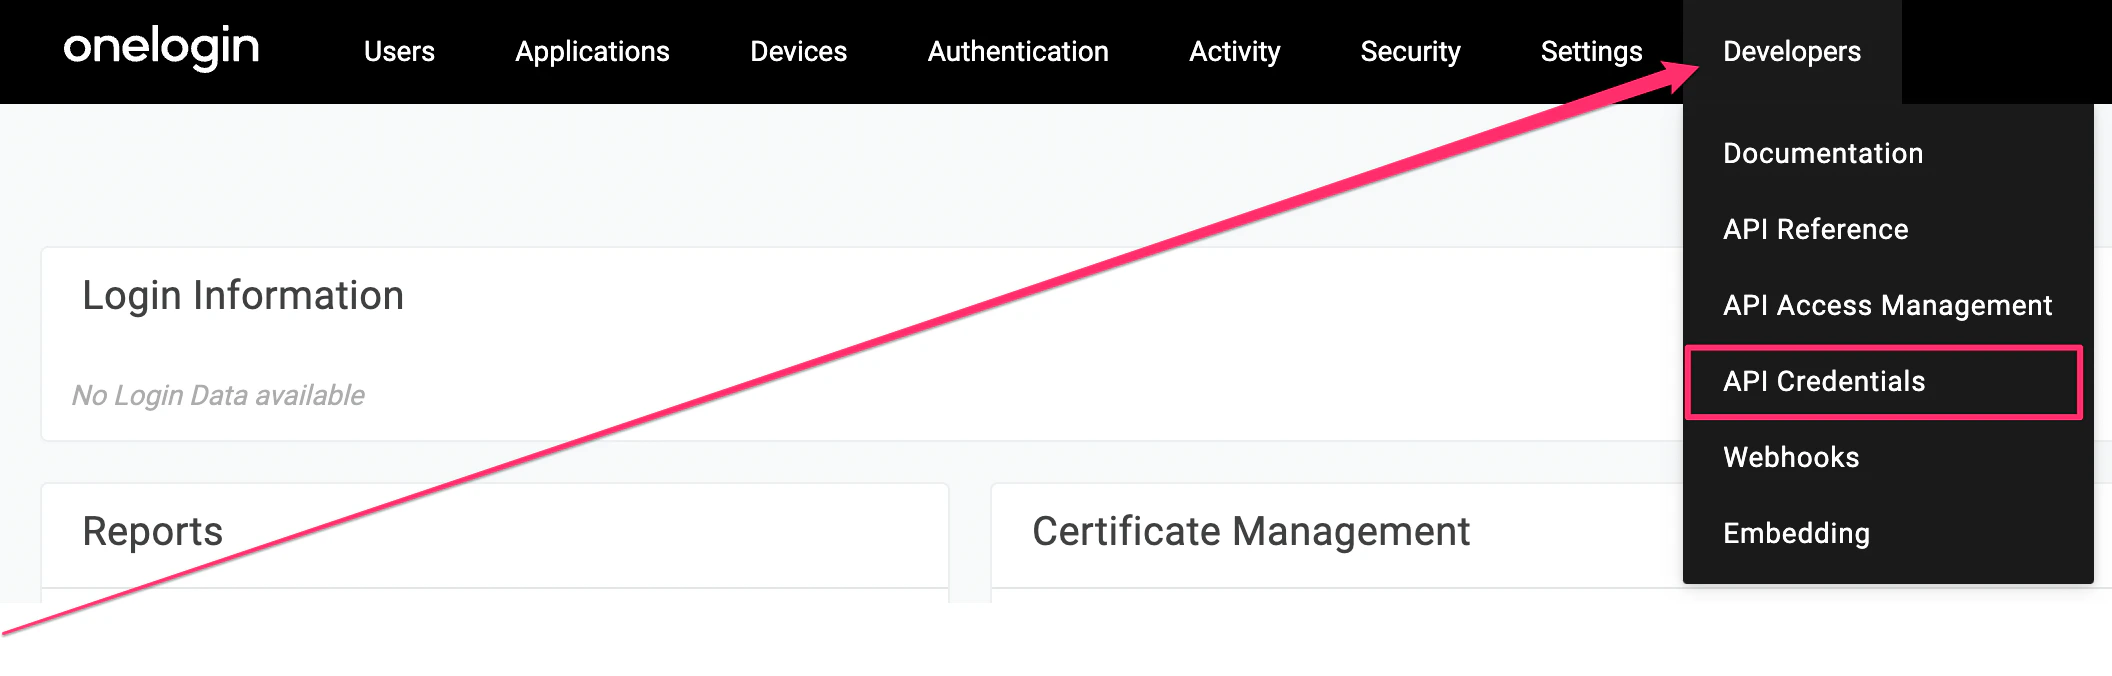
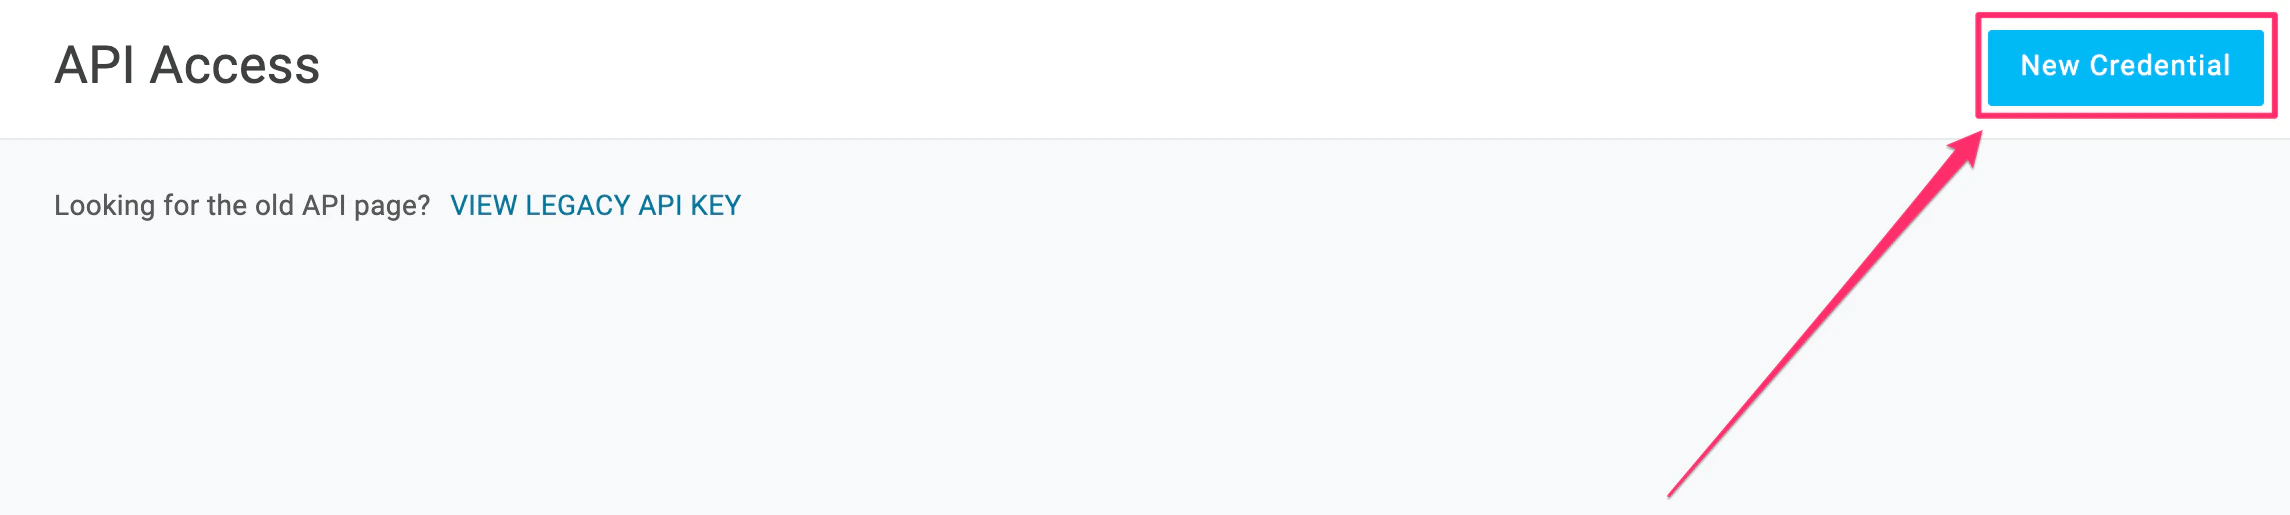
Navigate to Developers > API Credentials. Give the API credential a name, such as C1.
Select the Manage all scope.
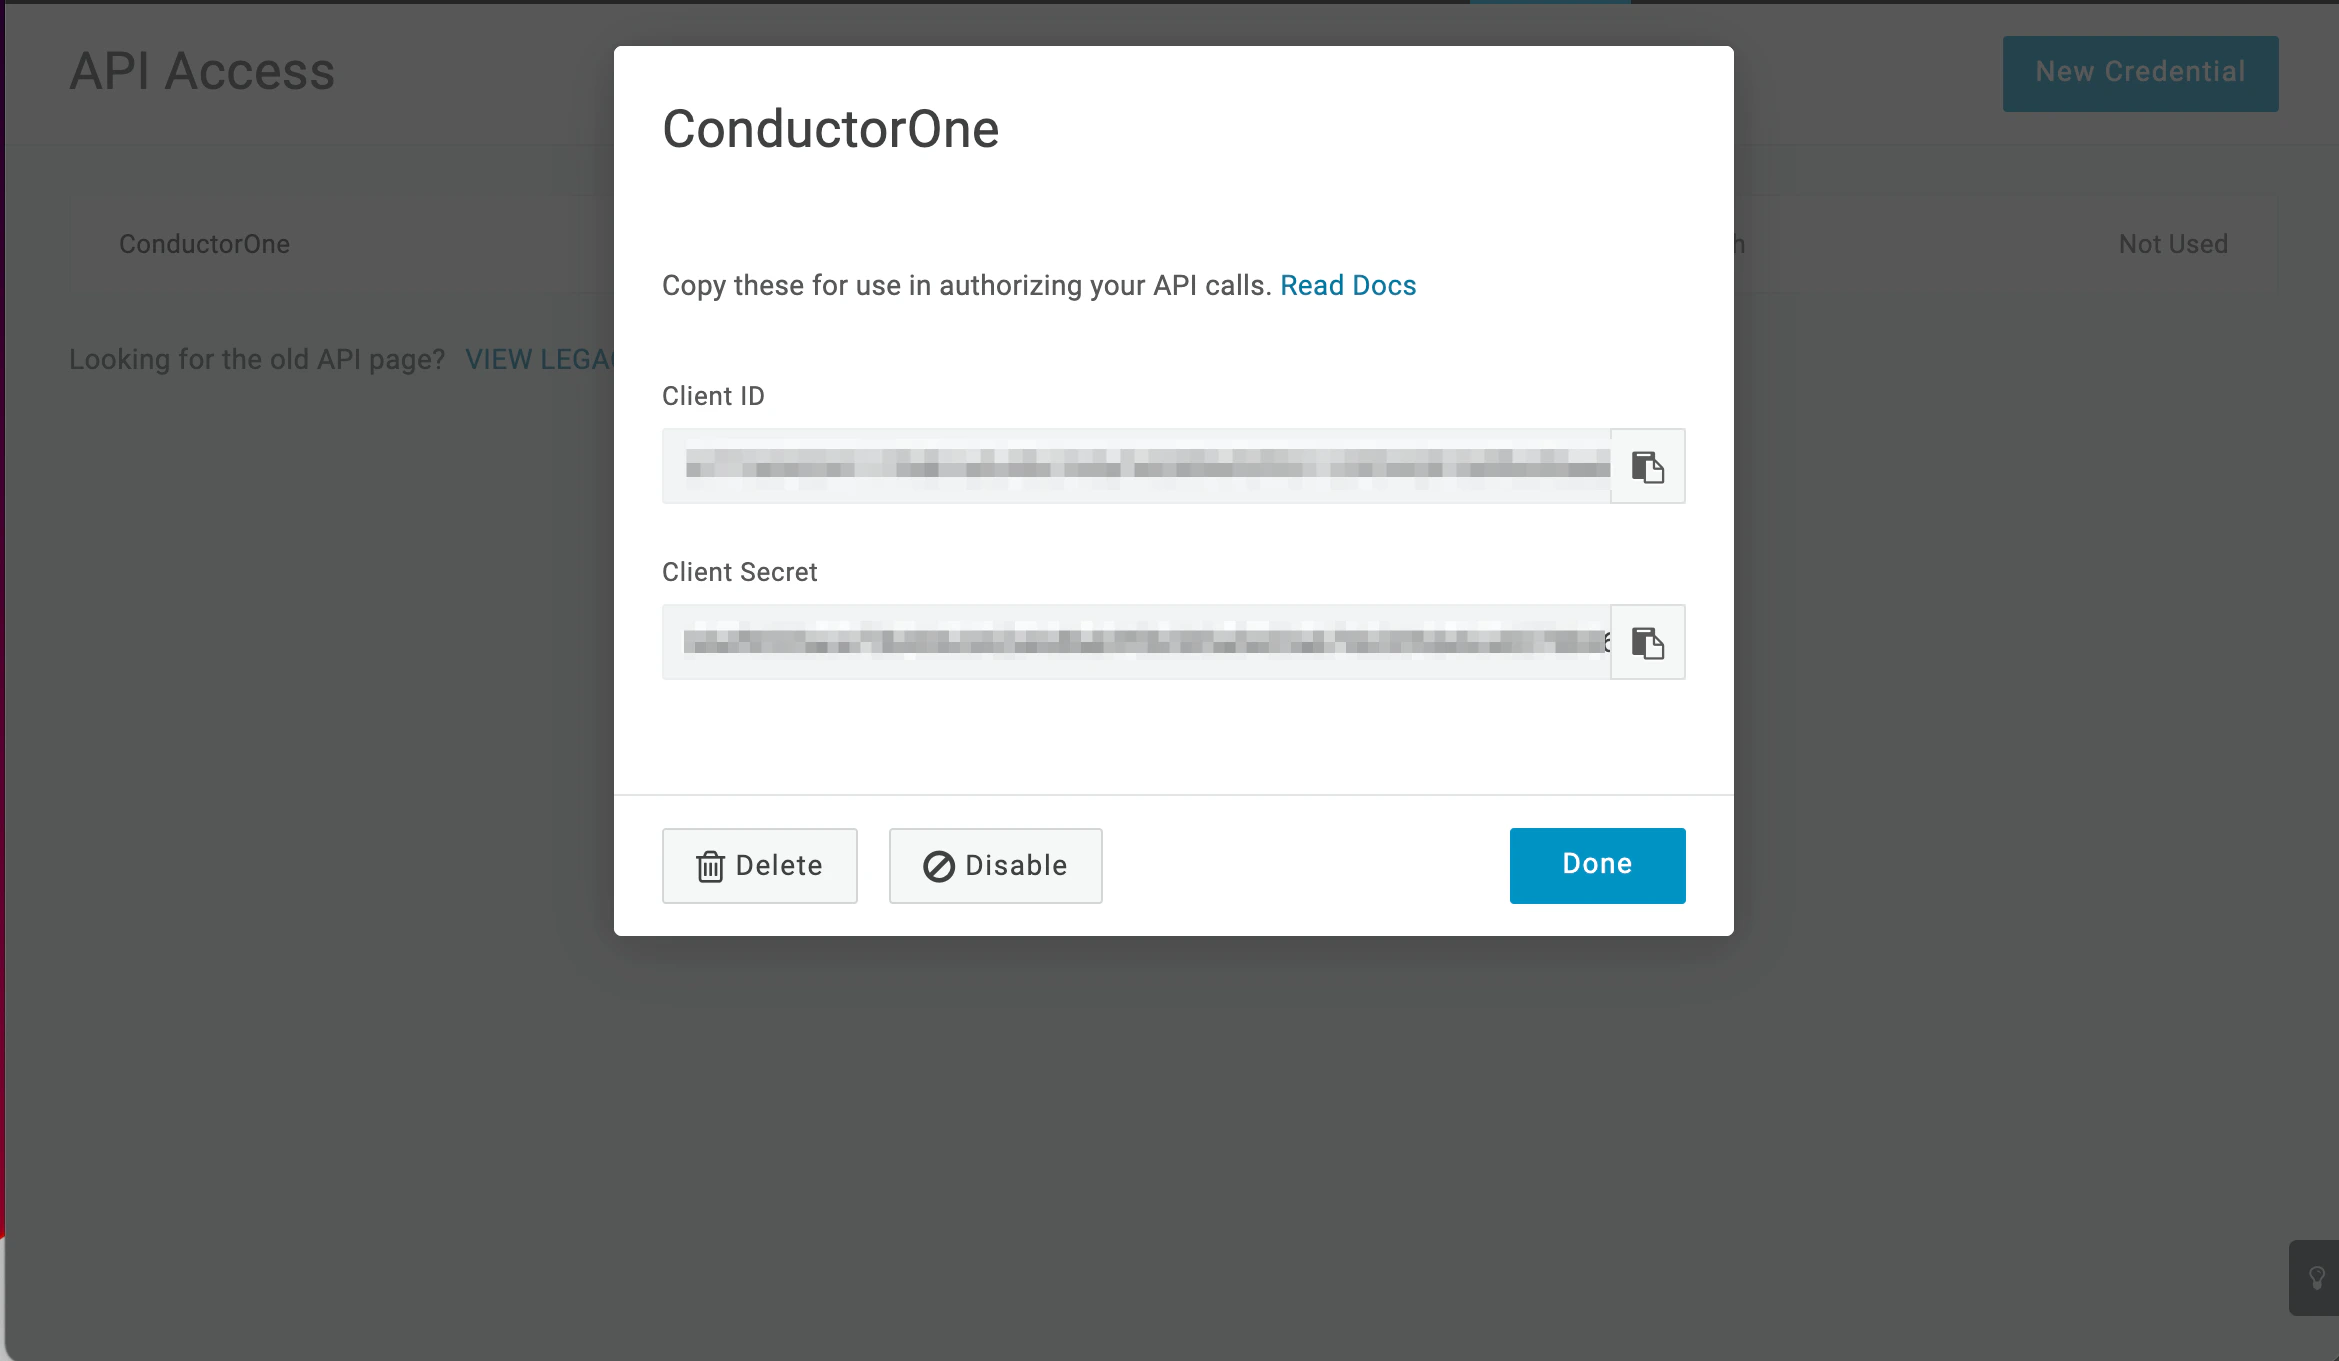
When the new API credential is created, copy and save the Client ID and Client Secret. To complete this task, you’ll need:
- The Connector Administrator or Super Administrator role in C1
- Access to the set of OneLogin credentials generated by following the instructions above
Follow these instructions to use a built-in, no-code connector hosted by C1.In C1, navigate to Integrations > Connectors and click Add connector.
Search for OneLogin v2 and click Add.
Choose how to set up the new OneLogin connector:
-
Add the connector to a currently unmanaged app (select from the list of apps that were discovered in your identity, SSO, or federation provider that aren’t yet managed with C1)
-
Add the connector to a managed app (select from the list of existing managed apps)
-
Create a new managed app
Set the owner for this connector. You can manage the connector yourself, or choose someone else from the list of C1 users. Setting multiple owners is allowed.If you choose someone else, C1 will notify the new connector owner by email that their help is needed to complete the setup process.
Find the Settings area of the page and click Edit.
In the OneLogin domain field, enter your OneLogin domain, which is found in the URL of your OneLogin instance: <YOUR DOMAIN>.onelogin.com.
In the OneLogin client ID field, enter the client ID.
Paste the client secret into the OneLogin client secret field.
Optional. If desired, click to enable Sync privileges.
The connector’s label changes to Syncing, followed by Connected. You can view the logs to ensure that information is syncing.
Follow these instructions to use the OneLogin connector, hosted and run in your own environment.When running in service mode on Kubernetes, a self-hosted connector maintains an ongoing connection with C1, automatically syncing and uploading data at regular intervals. This data is immediately available in the C1 UI for access reviews and access requests.Resources
Step 1: Set up a new OneLogin connector
In C1, navigate to Integrations > Connectors > Add connector.
Search for Baton and click Add.
Choose how to set up the new OneLogin connector:
-
Add the connector to a currently unmanaged app (select from the list of apps that were discovered in your identity, SSO, or federation provider that aren’t yet managed with C1)
-
Add the connector to a managed app (select from the list of existing managed apps)
-
Create a new managed app
Set the owner for this connector. You can manage the connector yourself, or choose someone else from the list of C1 users. Setting multiple owners is allowed.If you choose someone else, C1 will notify the new connector owner by email that their help is needed to complete the setup process.
In the Settings area of the page, click Edit.
Click Rotate to generate a new Client ID and Secret.Carefully copy and save these credentials. We’ll use them in Step 2.
Step 2: Create Kubernetes configuration files
Create two Kubernetes manifest files for your OneLogin connector deployment:Secrets configuration
See the connector’s README or run --help to see all available configuration flags and environment variables.Deployment configuration
Step 3: Deploy the connector
Create a namespace in which to run C1 connectors (if desired), then apply the secret config and deployment config files.
Check that the connector data uploaded correctly. In C1, click Apps. On the Managed apps tab, locate and click the name of the application you added the OneLogin connector to. OneLogin data should be found on the Entitlements and Accounts tabs.
What’s next?
If OneLogin is your company’s identity provider (meaning that it is used to SSO into other software), the connector sync will automatically create applications in C1 for all of your SCIMed software. Before you move on, review the Create applications page for important information about how to set up connectors for the SCIMed apps.